↧
GEAR: Aether X Spidi - The Eclipse Motorcycle Jacket


.jpg)
↧
CHEERS: The First Day Of The Next Chapter

Today I celebrate leaving my job to pursue a path that allows me to bridge my passions for design and motorcycles. It has taken a couple of years to really nail down, but now I know what the end goal is. Leaving the design studio was the first step to free up daylight hours. New Years resolution achieved.
Three years ago this all started for me with the CX500 and a domain name. Back then I would have considered this job change a "leap of faith," but the motorcycle community has been so welcoming that I feel more comfortable than ever. Hopefully, this year will see the launch of the new company I've been working out with a focus on aesthetically industrial items - from motorcycles and parts to decor and artwork. The aim is to blend my love for mechanical and artistic expression into one sole venture. I'm also planning on throwing a kick off party at the new shop space in Chicago this season. I'll reveal all the details as I nail it down, but you all are welcome.
Thanks to everyone that's been following, reaching out, collaborating and supporting all of this for the past 3 years. I finally feel like I'm in the right place.
↧
↧
DAILY INSPIRATION.

.JPG)
.JPG)
↧
MERCH: Machine Era Co. Tumbler
Tumbler
by Machine Era Co.
$60.00 (pre-order)
$60.00 (pre-order)
Machine Era - Tumbler from Machine Era Co. on Vimeo.
In true Machine Era fashion, this tumbler was milled out of a solid block of aluminum, hard anodized with a food grade coating and tumbled to a stone wash finish. I will say if this finish is anything like the wallet I have from them it LASTS. My wallet still looks brand new and I've been sitting on it for a year now. The tumbler is wrapped in a thick leather hide and hand stitched together to help keep the tasty stuff cold. They're available for pre-order here.
.jpg)

.jpg)
↧
DAILY INSPIRATION: Death Spray Customs "Black Polygon" Ducati Desmosedici RR

.jpg)
.jpg)
↧
↧
EVENT: Cafe Village at Road America - May 31 - June 1

↧
PROJECT DREAM ONE50: Crank It Up

The Honda CA95 Dream 150 build is chugging along smoothly. We came to the conclusion that the wiring on this thing was just way too simple. Honda didn't include turn signals on the 150cc model and the brake light is only activated by the rear brake foot pedal. This girl needed some 21st century modifications. The tired old selenium rectifier got tossed for a smaller more potent silicon unit from Oregon Motorcycle Parts. This will help increased battery charge from the internally regulated 6V system.
.JPG)
The good dudes over at Prism Moto Co. sent us a set of their super rad 25 LED brake lights to use on the build. We modified the wiring system to have these also function as turn signals. Getting them to work properly with the increased functionality took some trial and error but the outcome was spot on. I'l try to post a DIY on this later. We also added a 1A USB charger so Lauren will be able to charge her phone in the side bags while riding. Both the USB charger and LED tails required 12V power to function so we needed to run a couple step up converters to get the job done.
.JPG)
After bench testing the system we wrapped up the fresh harness, bolted all the components into the new stainless battery box, and snaked the wiring through the frame. The motor went back in the bike and all the components we reconnected. She's currently at super cranking status. Next we'll be working on fabbing up some new exhausts and mounting for the tail lights. Then we try to make the boom boom.
.jpg)
↧
DAILY INSPIRATION: BMW Concept Roadster Design Study
.jpg)

.jpg)
.jpg)
.jpg)
.jpg)
↧
DAILY INSPIRATION.


↧
↧
DAILY INSPIRATION.
Bike Swap Saturday. Kara's craving more CC's lately...

↧
DAILY INSPIRATION: Shipping Container Dwellings
Container Dwellings
.jpg)

.jpg)
.jpg)
.jpg)
.jpg)
.jpg)
.jpg)
.jpg)
.jpg)
↧
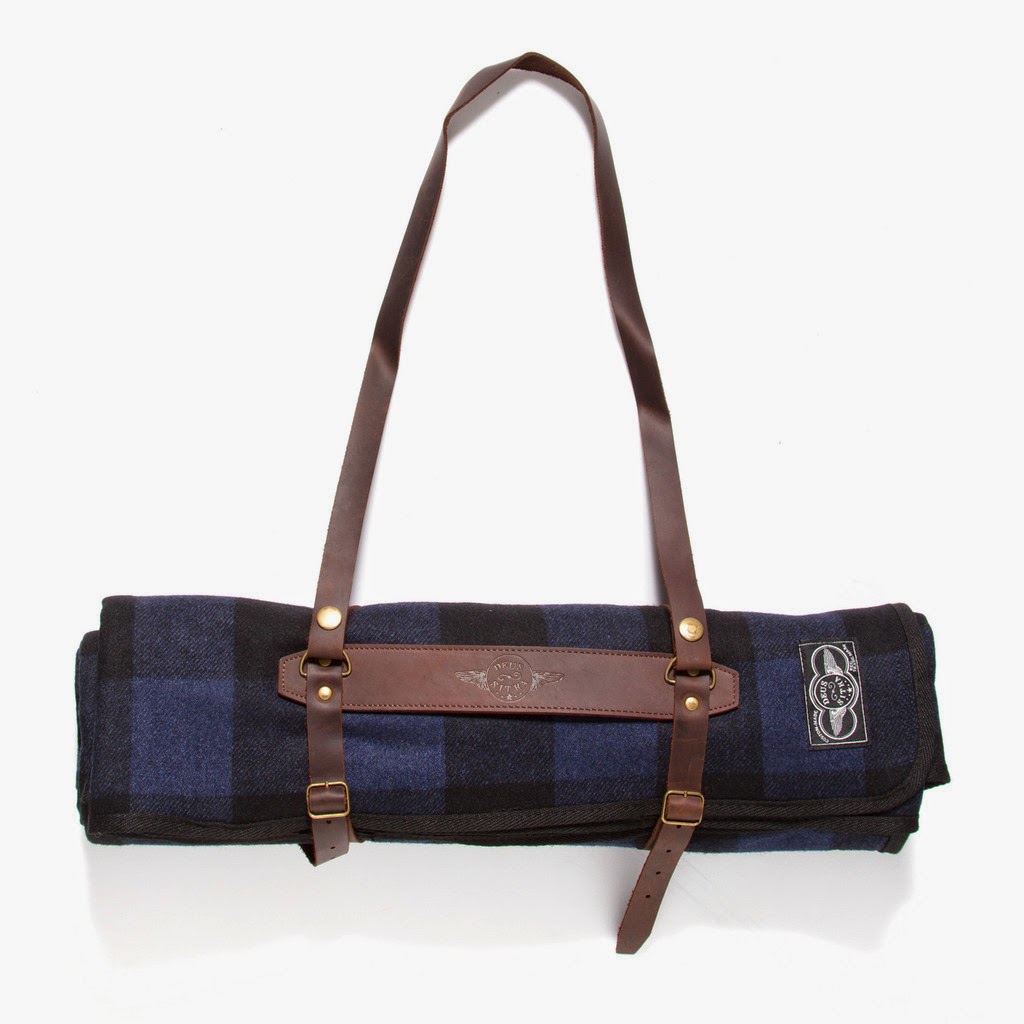
MERCH: Deus X Sitka - Dirt Nap Bedroll
.jpg)
.jpg)
↧
SHORT FILM: Soul Motor Co. 09 Panzer
Soul motor co 09 Panzer from Rodrigo Tuero on Vimeo.
↧
↧
ART&DESIGN: Honda CB92 SS - Painted by Kenji Shibata
.jpg)
.jpg)
.jpg)
.jpg)
↧
PROJECT CX500: Progressive 412 Rear Shocks
Rear Suspension Update:
Progressive Suspension 412 Series Shocks

The CX500 build is an ever evolving platform. I ride the bike daily around the city so it's both out of necessity and desire. Considering it started as a budget build there wasn't a lot of money thrown at the systems one might want to upgrade for improved performance - like suspension and braking. I'm slowly beginning to give attention to these areas on the bike when I've got time.
First up is that rear suspension. The shocks that used to be on there were far too stiff, and just plain shitty. I think they were Emgo units but I couldn't verify because they had no markings on them. I got to talking with David Z. over at Progressive Suspension about a new set up for the rear.
On Progressive's site they list the 412-4211C shock for a CX500 which is a 13" shock with a 90/130 spring rate and a 3.89" stroke.
I was looking for a 1" drop in the rear so I ran through their catalog and picked out the 412-4049B/C models. They're a 12.00" length with a 3.01 stroke and 90/130 rate. Meaning the shocks are an inch shorter but have a .88" shorter stroke and an identical spring rate. They come in Black and Chrome I believe. I've removed the dust covers from mine. So far I love them. The ride comfort is amazing yet still sporty. They're allowing me to go for much longer rides without ass-fatigue.
I know there are a lot of other CX owners that follow the blog so just sharing the info. :)
↧
DAILY INSPIRATION: Lindsay Bodanza's 1978 Honda CX500
1978 Honda CX500
The Honda CX500 has a lot to offer for the money, you just need to coax it out of it's terribly awkward shell. If you were to ask most riders to put a price tag on a "bullet proof, water cooled, shaft driven transverse V-Twin" you'd likely get figures in the Moto-Guzzi range. For those who can spot the swan in goose-down these bikes can be a great foundation to build from and had for roughly their weight in scrap. I picked up my donor for just $700, in running condition, with 3 rubber made bins filled with spare parts. Up until about a week ago I thought that was a great deal. Lindsay and Bryan slapped that thought in the mouth after picking up their CX500 specimen for just $275! I'm not even sure that would get you a plastic, Chinese, 'No. You-build-it', bicycle from Wal-Mart. They may have a future as contractual Craigslist-whisperers. Craigslist-whisperers that have the ability to turn their super-thrift bounty into super-rad machinery. Here's the scoop from Lindsay on how this stunning CX came to be.
.jpg)
"My boyfriend Bryan Dawley is a Product Designer and started building the CX in his garage with the intention of selling it. Since it was a side project he did for fun it took the better part of a year to complete. I spent many a weekend with him down in the garage helping him with the fabrication work, welding or grinding bits and pieces off of the metal frame. I didn't see his end vision for the bike and initially thought it was ugly. During those months I became interested in riding a motorcycle myself and eventually bought a 1966 Honda S90 as a starter bike. Within a week, I wanted more CC's. It was around that time that we finally had the CX wired with a fiberglass seat pan installed and fired her up for the first time. The engine sounded amazing and I took it for a spin down the 101 in Encinitas and fell in love. Dawley knew from the moment I pulled back into the garage with a smile from ear to ear that he wasn't going to be selling the bike. From that point on I became more involved and interested in all of the finishing details. When Christmas rolled around that year, the bike was finished and Dawley surprised me with the title and key wrapped up in a Christmas box. It's hands down the best gift I ever got from a man."


"The bike is now up in LA and without fail, every time I ride it someone stops and asks what make and model it is, or comments on how mean and badass it looks. A lot of people think it's a Moto Guzzi at first glance. Regardless of the attention it gets, the bike will always have a special place in my heart."
Specs:
- New front end, brakes and electrical
- Chopped and capped subframe
- Firestone Champion Deluxe tires (Lindsay's planning to swap these out for some dual-sport tires soon)
- Dual gauges - speedo and tach
- New CDI box to make it run.
- Built battery box and relocated under engine
- Relocated all electronics into pan under seat frame
- Gazi Shocks, 14 in eye to eye
- Deluxe tank found on eBay. Painted it Land Rover Coniston Green
- Rebuilt carbs
- Ground all tabs off frame
- Laid up fiberglass seat pan and had a custom seat upholstered
- Fabricated headlight mount to run 6in. vintage light


Lindsay's part of the all girl rider group - Venice Vixens.
Follow them on Instagram: @VeniceVixens
↧
FILM: On Any Sunday - The Next Chapter
↧
↧
PROJECT DREAMONE50: How To Replicate an Exhaust 101
Turns out finding a clean set of headers for one of the first motorcycles Honda brought to the US is nearly impossible. Lucky for me the Honda CA95 exhaust may be the easiest system to replicate. The radii of the bends differ slightly from the left to right cylinder but otherwise they're just one bend then straight back. The only aftermarket systems out there are from Taiwan and are not mandrel bent. This means the pipes have a crushed inner radius and are oval through the bend zone. I bought a set of these to check them out. They were indeed total shit. Here's a quick tutorial on how I made a fresh set.
The first hurdle I had was sourcing the correct mandrel U-bend sections. Pipe bends are measured by their center line radius, or CLR. The pipes on this bike are only 1.25"OD so they're difficult to find especially in specific radii. My stock bend measurements were around 4.00" CLR for the left cylinder and 3.75" CLR for the right. I found U-Bends in the 3.75" measurement at www.mandrel-bends.com but could not find 4" anywhere. So I bought 2 of the 3.75" to see if I could make it work. Which I did. I won't leave you hanging.

1. Chopped out the bend section of the stock pipes, leaving at least a couple inches of straight on either end.2. Set up the above jig to map out the angle coming from before and after the radius.

3. Fit the new bend into the jig aligning it against one of it's straight sections. In this case the upper straight. Mark where the lower portion of the bend touches the jig/wood and mark your cut at 90 degrees to the jig.

4. Chop it. Above is showing what the new setup will look like pre-weld.5. Put the stock pipe with header flange back into the jig and mark where the flange ends (I marked it on the upper piece of wood.)

↧
SHORT FILM: I Will Ride It
I Will Ride It from Thrive Motorcycle on Vimeo.
↧
DAILY INSPIRATION.


↧